Monitoring our cat with Twine
I was lucky enough to be gifted a Twine by my colleagues at Go Free Range last weekend, and I took the opportunity to put together a very simple service that demonstrates how it can be used.
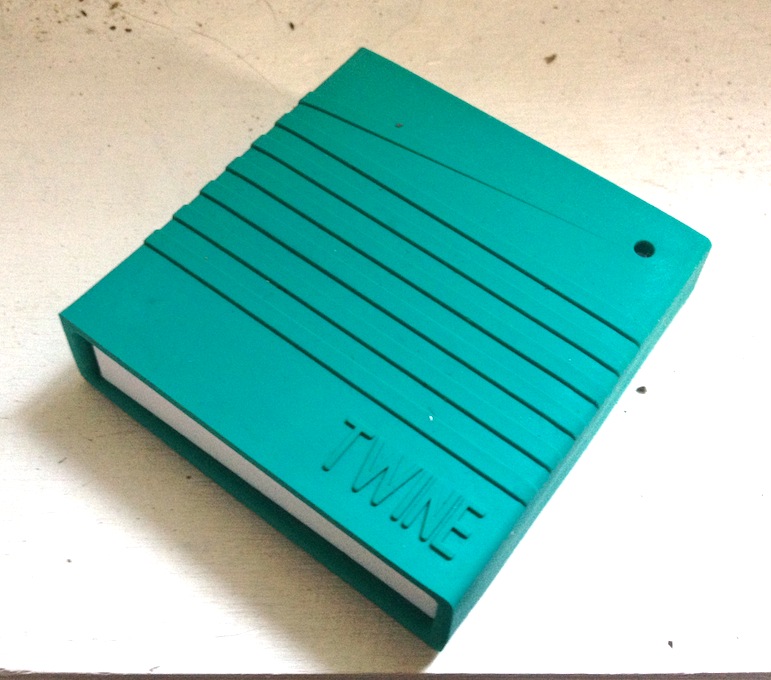
The Twine
If you haven’t heard of Twine, it’s a hardware and software platform for connecting simple sensors to the internet, and it makes it really very easy to do some fun things bridging the physical and online worlds.
Hardware
On the hardware side, there’s a simple 2.7” square that acts as a bridge between your home WiFi network and a set of sensors.
Some of the sensors are built in to the square itself: temperature, orientation and vibration can be detected without plugging anything else in. You can also get external sensors, which connect to the square via a simple 3.5mm jack cable. If you buy the full sensor package, you’ll get a magnetic switch sensor, a water sensor and a ‘breakout board’ that lets you connect any other circuit (like a doorbell, photoresistor, button and so on) to the Twine.
Setup
Connecting the Twine to a WiFi network is elegant and features a lovely twist: you flip the Twine on its “back”, like a turtle, and it makes its own WiFi network available.
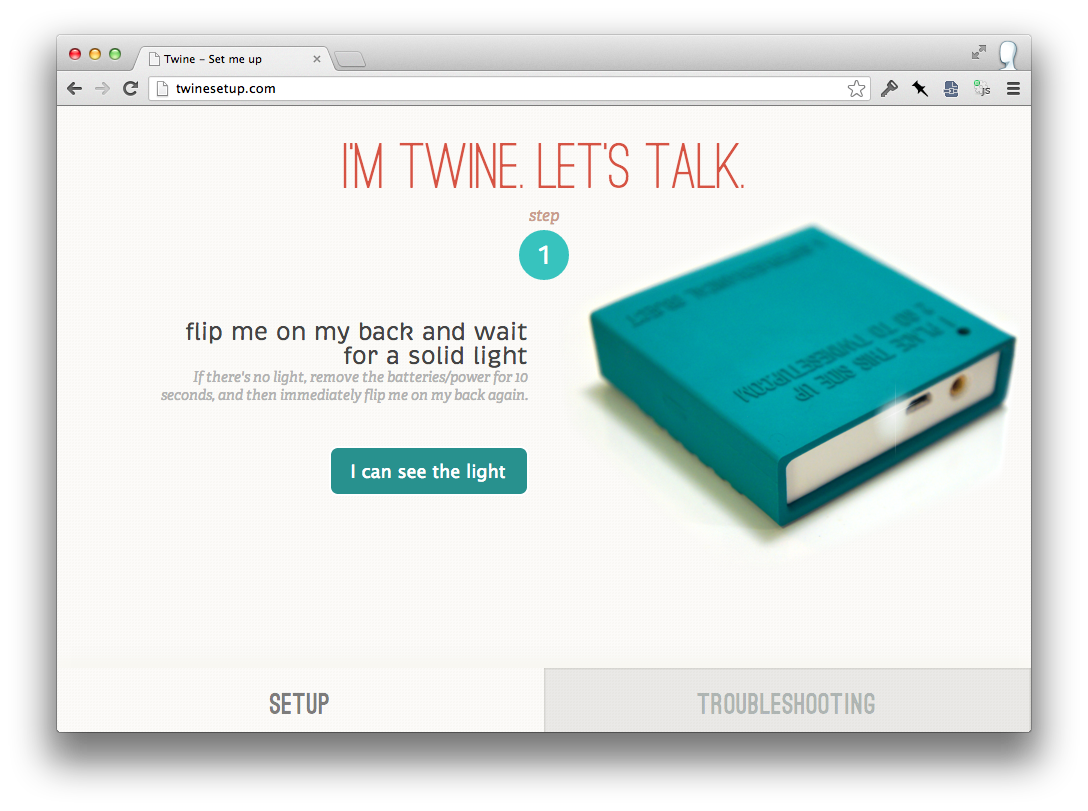
Connect to this from your computer, and you can then give the Twine the necessary credentials to log on to your home network, and once you’re done, flip it back onto its “belly” again and it will be ready to use. I really loved this simple, physical interaction.
Software
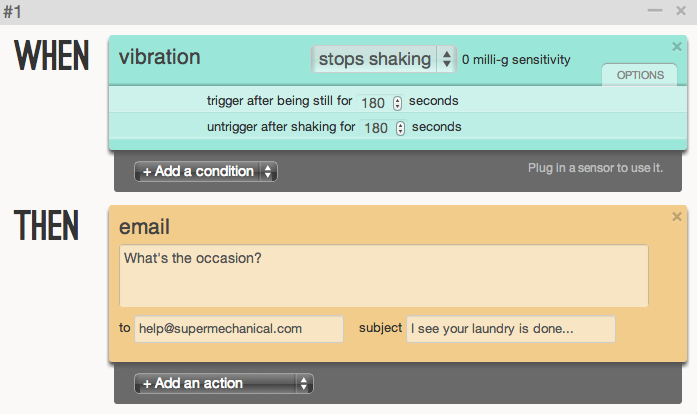
On the software side, Twine runs an online service that lets you define and store ‘rules’ to your connected Twine units. These rules take the form of when <X> then <Y>, in a similar style to If This Then That. So, with a rule like when <vibration stops> then <send an email to my phone>, you could pop the Twine on top of your washing machine and be alerted when it had finished the final spin cycle.
Connectivity
As well as emailing, the Twine can flash it’s LED, tweet, send you an SMS, call you, or ping a URL via GET or POST requests including some of the sensor information.
Supermechanical, the company that launched Twine about a year and a half ago via Kickstarter, maintains a great blog with lots of example ideas of things that can be done.
All technology tends towards cat…
Just as the internet has found its singular purpose as the most efficient conduit for the sharing of cat pictures, so will the Internet of Things realise its destiny by becoming entirely focussed on physical cats, in all their unpredictable, scampish glory.
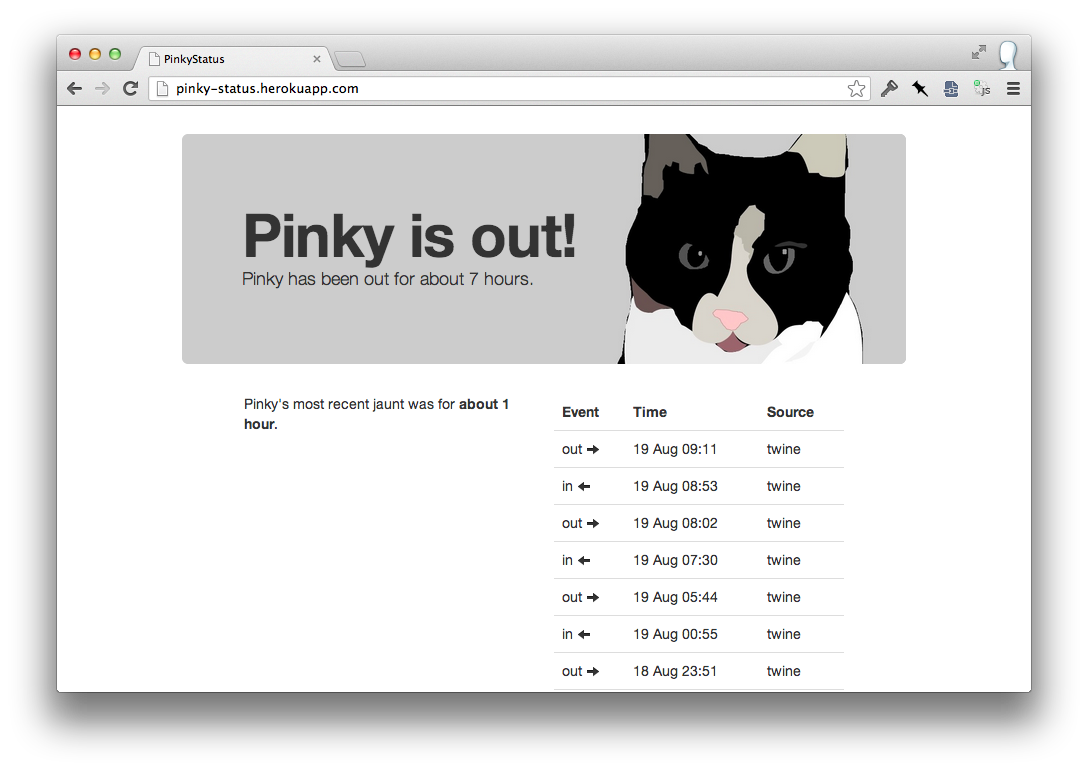
It’s neat having something in your house tweet or send you an email, but I like making software so I decided to explore building a simple server than the Twine could interact with, and thus, “Pinky Status” was born:
What follows is a quick explanation of how easy it was.
The sensor
I hooked up the magnetic switch sensor to the Twine, and then used masking tape to secure the sensor to the side of the catflap, and then the magnet to the flap itself.
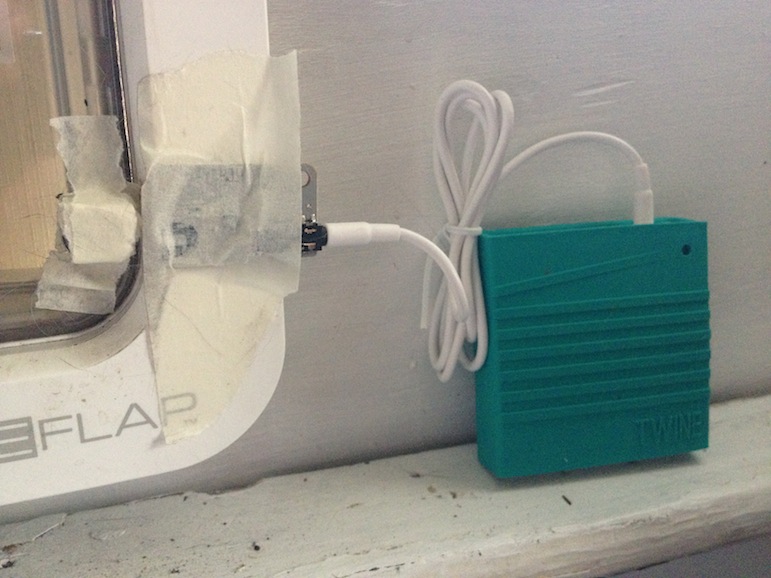
That way, when “Pinky” (that’s our cat) opened the flap, the magnet moves away from the switch sensor and it enters the ‘open’ state. It’s not pretty, but it works.
The Rule
Next, we need a simple rule so that the Twine knows what to do when the sensor changes:
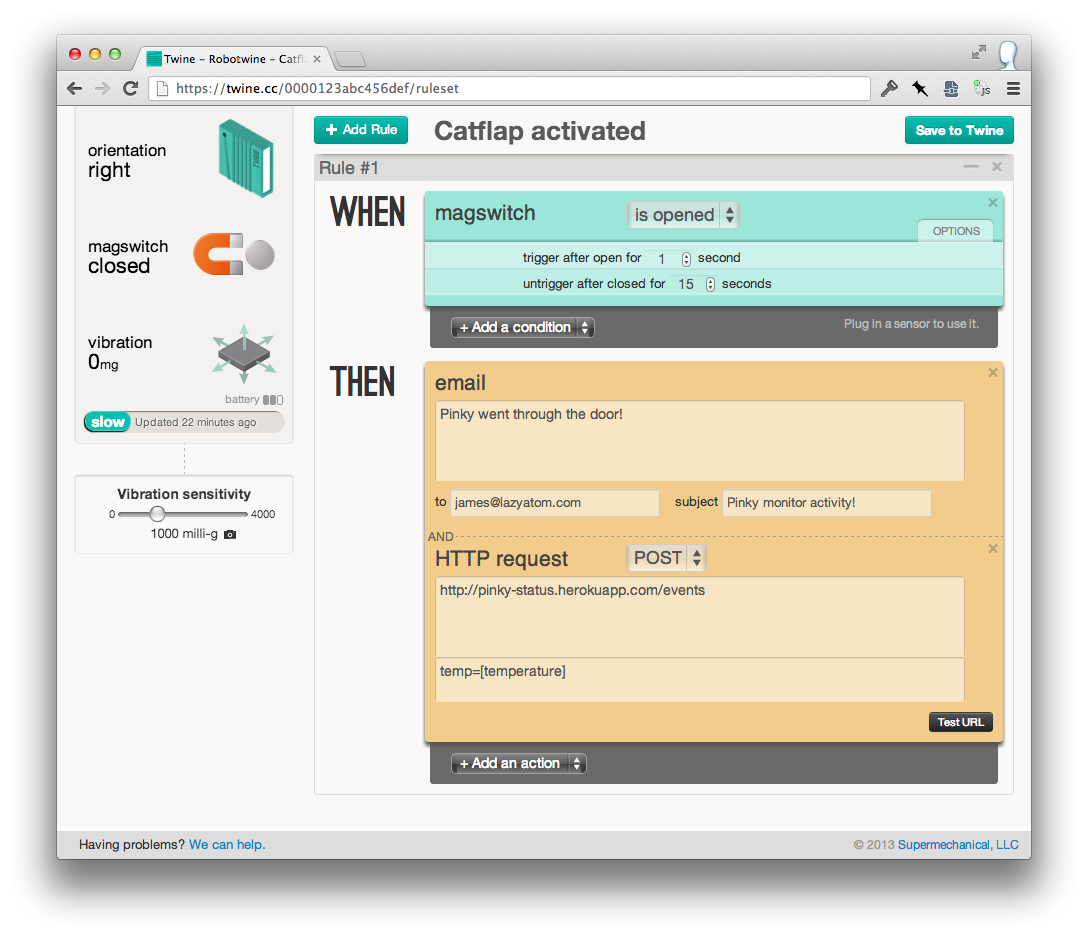
When the sensor changes to open, two things happen. Firstly, I get an email, which I really only use for debugging and I should probably turn it off, except that it’s pretty fun to have that subject line appear on my phone when I’m out of the house.
Secondly and far more usefully, the Twine pings the URL of a very, very simple server that I wrote.
A simple service
Here’s the code, but it’s probably clearest to view an earlier Sinatra version than the current Rails implementation:
require "rubygems"
require "bundler/setup"
require "sinatra"
require "data_mapper"

DataMapper::setup(:default, ENV['DATABASE_URL'] || 'postgres://localhost/pinky-status')

class Event
  include DataMapper::Resource
  property :id, Serial
  property :source, Enum[:manual, :twine], default: :twine
  property :status, Enum[:in, :out]
  property :created_at, DateTime

  def self.most_recent
    all(order: [:created_at.desc]).first
  end

  def self.most_recent_status
    most_recent ? most_recent.status : nil
  end

  def self.next_status
    if most_recent_status
      most_recent_status == :in ? :out : :in
    end
  end
end

DataMapper.finalize

Event.auto_upgrade!

get "/" do
  @events = Event.all
  @most_recent_status = Event.most_recent_status
  erb :index
end

post "/event" do
  Event.create!({created_at: Time.now, status: Event.next_status}.merge(params[:event] || {}))
  redirect "/"
end
The key part is at the very bottom – as Twine makes a POST request, the server simply creates another Event record with an alternating status (‘in’ or ‘out’), and then some logic in the view (not shown) can tell us whether or not the cat is in or out of the house.
In more recent versions of the code I’ve moved to Rails because it’s more familiar, but also slightly easier to do things like defend against duplicate events (normally when the cat changes her mind about going outside when her head is already through the flap) and other peripheral things.
But don’t be dissuaded by Rails - it really was as trivial as the short script above , showing some novel information derived from the simple sensor attached to the Twine. Deploying a server is also very easy thanks to tools like Heroku.
Conclusions
A few hours idle work and the secret life of our cat is now a little bit less mysterious than it was. I really enjoyed how quick and painless the Twine was to setup, and I can highly recommend it if you’re perhaps not comfortable enough to dive into deep sea of Arduinos, soldering and programming in C, but would still like to paddle in the shallower waters of the “internet of things”.